


Creating custom DTF transfers can be a game-changer for your business or personal projects. This innovative printing method offers high-quality, vibrant results on a variety of materials.
But what exactly are DTF transfers?
DTF, or Direct to Film, is a printing technique that transfers designs directly onto a film. This film is then heat-pressed onto your chosen material, creating a durable and vibrant print.
This article will guide you through the process of creating stunning DTF transfers. From the materials you’ll need, to the design and printing process, we’ve got you covered.
Whether you’re a small business owner, a DIY enthusiast, or a professional in the printing industry, this guide will provide you with the knowledge to produce impressive DTF heat transfers.
So, let’s dive in and start creating your custom DTF transfers.
1000+ T-shirt DTF design / A to Z / for clothing business and personal use
Understanding DTF Transfer Printing
DTF transfer printing is a cutting-edge method gaining traction in the apparel industry. It’s known for producing bright, detailed designs on fabric. The process involves printing a design onto a special film, which is then adhered to textiles with heat and pressure.
Unlike traditional screen printing, DTF allows for more versatile applications. It supports full-color spectrum designs without the need for multiple screens. This makes it ideal for intricate designs and quick-turnaround projects.
One major advantage of DTF transfer printing is its flexibility. It works well on many fabric types, including cotton, polyester, and blends. This means you can expand your product offerings and cater to diverse customer needs.
Additionally, DTF transfers offer long-lasting results. They exhibit superior washability and resistance to wear, keeping your designs vivid over time. With these benefits, understanding DTF printing can significantly enhance your production capabilities.
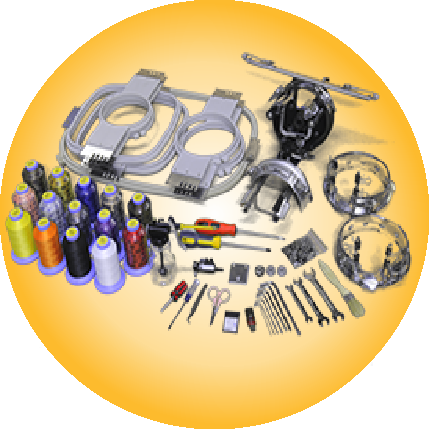
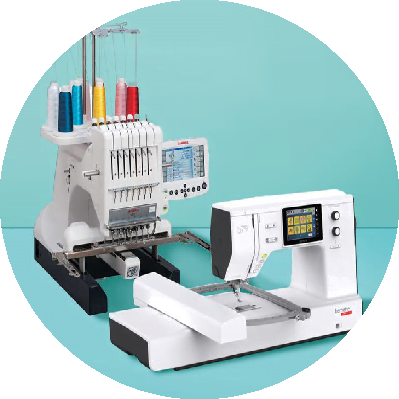
Materials and Equipment You’ll Need
Creating custom DTF transfers requires specific materials and equipment. Each element plays a crucial role in the printing process. With the right tools, you can achieve excellent results.
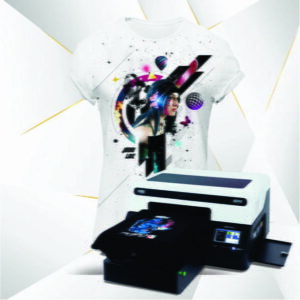
Essential materials include DTF printers and transfer films. You’ll also need powder adhesive and a reliable heat press. These form the core of your setup, making your designs transferable to fabric.
Other vital components include high-quality inks. The right inks ensure vivid colors and detailed images. Additionally, a curing oven or heat gun is necessary for setting the adhesive.
Here’s a quick list of what you’ll need:
- DTF Printer
- DTF Transfer Films
- Powder Adhesive
- Heat Press
- High-Quality DTF Inks
- Curing Oven or Heat Gun
Investing in high-grade transfer sheets is also important. They affect the final quality of your transfers. Lastly, make sure you have a clean workspace to maintain your equipment properly. This ensures longevity and consistent output.
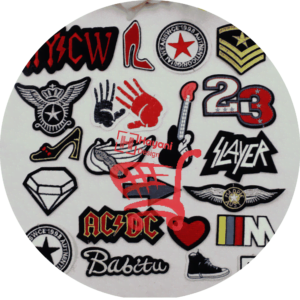
Designing Your Custom DTF Transfer
Free 2000+ Anime T-shirt DTF design for clothing business and personal use
Designing is a critical step in creating custom DTF transfers. Start with clear, high-resolution artwork. This ensures sharp and vibrant prints.
Use design software to create or refine your designs. Programs like Adobe Illustrator or Photoshop are popular choices. They offer tools for precise detail work and color management.
When designing, consider the fabric colors. Adjust your design to complement or contrast the garment’s color. This helps your transfer stand out.
Remember to save your design in a compatible file format. Common formats include PNG or TIFF. These preserve quality for printing and transfer.
Preparing Your DTF Transfer Sheets
3000+ Editable DTF T-Shirt Designs Mega Bundle
Before starting, ensure your DTF transfer sheets are high-quality. Quality sheets improve print sharpness and durability. Always choose sheets suitable for your printer.
Keep your transfer sheets in optimal condition. Store them in a cool, dry place. This prevents moisture damage and ensures consistent results.
When ready to print, load the sheets correctly. Make sure they are smooth and flat. Any folds or wrinkles can affect the print output.
Check your printer settings before printing. Use the recommended settings for your DTF sheets. This helps achieve the best possible print quality.
Applying Powder Adhesive and Curing
Applying powder adhesive is crucial in DTF transfer printing. It provides the sticky backing needed for transfer. Evenly sprinkle the adhesive powder over the printed film.
Ensure the powder covers all ink areas. Missing spots can lead to incomplete transfers. Gently shake the film to remove excess powder.
Curing the adhesive is the next step. Use an oven or heat press for this process. Temperature settings should be accurate to avoid damaging the film.
Time is also critical during curing. Follow guidelines for optimal results. Proper curing ensures the adhesive bonds well and the transfer lasts longer.
Cutting, Weeding, and Storing Transfers
Once the adhesive is cured, it’s time for cutting. Use a high-quality cutter to trim excess material. Precision is key in this step to ensure clean edges.
Weeding involves removing unwanted portions. Carefully peel away non-image areas. A weeding tool can aid in this meticulous task.
Proper storage of your custom DTF transfers is essential. Store them in a cool, dry place. Humidity and heat can damage the transfers.
Keep these points in mind to maintain transfer quality:
- Ensure the storage area is free of moisture.
- Avoid stacking transfers without protective layers.
- Label each transfer for easy identification.
Heat Pressing: Techniques and Settings
Heat pressing custom DTF transfers requires precise technique. First, ensure your heat press is pre-heated. The temperature setting is crucial for optimal results.
Different fabrics need different settings. Check the manufacturer’s recommendations for each material. This ensures proper adhesion and prevents damage.
Apply even pressure throughout the transfer. This avoids uneven prints and ensures a smooth finish. Make sure to cover the entire design area uniformly.
Quick checks are beneficial. After pressing, slowly peel the transfer sheet. Ensure that the design has fully adhered. If needed, press again briefly for better results.
Troubleshooting Common DTF Issues
When using custom DTF transfers, you’ll encounter issues like color bleeding. This often results from incorrect temperature settings. Adjust your heat press to correct the issue.
Peeling can happen if pressure is uneven. Check that your press applies consistent pressure across the transfer. Adjust pressure settings as needed.
Cracking can occur after washing. Double-check curing times and temperatures during the process. Ensuring these are correct helps maintain durability.
Finally, alignment issues can affect design placement. Carefully position your transfer sheet before pressing. Use guides to ensure consistent design alignment.
Conclusion: Achieving Professional-Quality Results
3000+ Editable DTF T-Shirt Designs Mega Bundle
Creating stunning custom DTF transfers involves precision and care at each step. Focus on detail to enhance the final product quality.
Start with high-quality materials, which are essential for durability. Investing in good DTF transfer sheets makes a noticeable difference.
Carefully follow guidelines on temperature and pressure settings. These factors influence the longevity and appearance of the design.
Practice makes perfect in DTF transfer printing. Continually refine your technique to master professional-quality transfers every time.


Add comment
You must be logged in to post a comment.